Cabinet Repair 101: What To Know About Restoring Your Cabinets
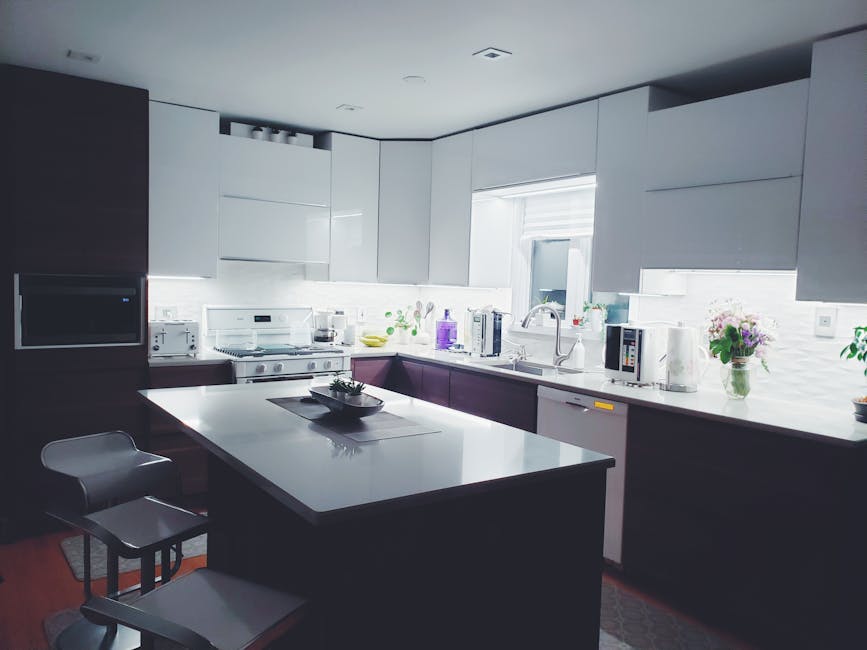
Photo from Pexels
Originally Posted On: https://www.mrhandyman.com/dallas/about-us/ask-a-pro/2020/september/cabinet-repair-101-what-to-know-about-restoring-/
Your kitchen cabinets take up the most real estate in the room. This is why the state and design of your cabinets can really impact the overall functionality of your kitchen.
Perhaps your kitchen cupboards have been recently damaged—or you have been putting off a few cabinet maintenance tasks—and you need help with your cabinet repair to-dos.
Whatever the case may be, there are a number of important factors in deciding if you should replace or repair your cabinets—and what kinds of repairs are best suited for your existing cupboards.
While there is a lot to learn about repairing your cabinets, our expert team has created this blog post to walk you through what you need to know to fix-up your cupboards. Read on to discover when it’s worth repairing your cabinets rather than replacing them, the DIY steps to some basic cabinet repairs and when to call the pros at Mr. Handyman Dallas.
Should You Repair or Replace Your Cabinets?
Before diving into cabinet repair, it’s important to understand if you should repair them in the first place. If you answer “no” to the following question, then it is well worth taking the time to refinish or paint your cabinets instead of replacing them completely.
ARE YOUR CABINETS SERIOUSLY DAMAGED FROM WATER?
If your cabinets have light water damage, say you spilled a glass of water in your wood cabinets and they have warped slightly, then you may still be able to undertake cabinet repairs. However, if your cabinets no longer close properly, they are bubbling on the inside or outside, or the wood has started to blacken, then you may want to consider replacing your cabinets instead.
THE OVERALL FUNCTION OF YOUR CABINETS IS FRUSTRATING
No matter how beautiful your cabinets might be, if the design and flow of your kitchen is just not working for you, you might want to replace your cabinets. For instance, you will likely need to replace your cabinets if they are:
- Difficult to access.
- Out of your reach.
- Open incorrectly or consistently get stuck.
YOUR CABINETS HAVE DISCOLORED
If you are noticing black, green or white discoloration around your cabinets it is time to get new ones. Unfortunately, your cabinets have been damaged beyond repair and your only choice is to track down the source of the discoloration, find a way to prevent further discoloration and install brand-new cabinets.
Common Cabinet Repairs
Sometimes your cabinets have slight damage that can be easily repaired by either you or the expert technicians at Mr. Handyman Dallas—helping you avoid having to replace your cabinets. Common problems with cabinets that are easily solved by our skillful team include:
ADJUSTING HINGES ON MISALIGNED DOORS
If your cabinet doors are not aligned correctly, it’s most likely that either the side screw, the depth screw or a screw that moves the cabinet up or down needs to be adjusted:
- The side screws impact whether your cupboard doors are properly aligned to the left and to the right.
- The depth screw impacts how far back or how far forward your cabinet door is.
- Some cabinets are built with a screw that moves them up or down. If this is not the case and one of your doors is higher than the other, you will have to adjust your cabinet by loosening the mounting screws.
In each of these instances, you will have to find the correct screw that impacts the alignment problem you are trying to fix. Then, simply tighten, loosen and adjust your cupboard doors as you see fit until they are realigned.
REPLACING LATCHES THAT NO LONGER CLOSE CORRECTLY
Most new cabinets have self-closing hinges that keep the doors shut. However, some cupboards use magnetic or roller catches. Should any of these latches become damaged, you have two options to fix them:
- Replace the latch. Simply visit your local hardware store, buy a new latch, unscrew the old latch, and screw in the new latch.
-
Adjust the latch. If the latch seems fine but your cupboard doors are still not closing, you might have to fiddle with the catch a bit until it works again. Loosen the screws holding the catch in place, move it in or out, and retighten the screws. Repeat until the latch works correctly.
ADDING BUMPERS TO EXISTING CABINET DOORS
This cabinet repair solution is truly a breeze. To prevent cabinets from banging shut, purchase a pack of peel-and-stick door bumpers at your local hardware store. Then—ensuring your cupboard doors are clean so the bumper sticks—place one bumper at both the top and bottom corners of the cabinet door.
GLUING LOOSE CABINET KNOBS
Is your cabinet knob loose even though you have tried tightening the screw? If so, this indicates that the problem is with the screw itself. But before you get worried that you will have to buy new knobs or that the screw is scratched, try gluing the knob first. To do this, select a thread-locking adhesive and apply a small amount to the screw. Then, slid the knob back onto the screw and let it dry.
If you want to replace your kitchen knobs in the future, the adhesive will break when you use a screwdriver.
FILING STRIPPED SCREW HOLES
While a stripped screw hole may seem like a hassle to fix, it is actually fairly easy to repair. First, remove the screw and the cabinet door knob. Then, dip toothpicks in wood glue and place as many as you can into the hole. Break off the tooth picks and wipe away any excess glue. Then simply reinstall the door knob by screwing directly into the toothpicks.
TOUCHING UP NICKS AND SCRATCHES
Do you have unsightly nicks and scratches in your cabinet doors, but not enough to justify refinishing the cupboard entirely? Instead, use a stain-filled touch-up marker to color in the scratches. Simply dab on the stain and wipe away any excess.
*Pro Tip: Use a stain that is slightly lighter than your existing cabinets. Cabinet scratches absorb stain very easily, so it is possible that they may look darker than the rest of your cupboard doors if you do not use a lighter stain.
REPAIRING BROKEN HINGES
If your hinge has snapped off your kitchen cupboard, then your best option is to repair the hole with gap-filling glue. First, remove the hinge from the damaged door. Then, apply petroleum jelly to the moveable parts of the hinge. This will protect them from the glue.
Then, scuff up the part of the hinge that will contact the glue. This will help make it stick better. Apply the glue to the damaged part of the door and immediately reinstall the hinge and screws. Use clamps or weights to keep the hinge in place while the glue dries.
CLEANING RUSTY HINGES
Cleaning rusty hinges is an easy process, but it does require a little patience. Follow the steps below to repair rusty hinges:
-
Remove the latch and screws.
-
Scrub with steel wool to remove as much rust as possible.
-
Place rusty hardware in a container.
-
Fill the container with cola. Sodas contain phosphoric and carbonic acids, which remove rust.
-
Wait three hours and check to see if the rust has been removed. Continue this process every three hours until all signs of rust are gone.
-
Clean the hinge in warm, soapy water and dry completely.
-
Reinstall the hinge.
Other Kinds of Cabinet Repair
Sometimes your cabinets have become so damaged or out-dated that a quick fix is not the best solution. If this is the case—and if your cupboards are still structurally sound—then, consider painting or refinishing your cabinets instead of replacing them.
Refinishing VS Painting Cabinets
If your cabinets are looking worn out or it’s time to upgrade your kitchen, then consider refinishing or painting them as a cost effective alternative to a cabinet replacement project. Both strategies offer different benefits and drawbacks.
THE PROS AND CONS OF REFINISHING CABINETS
This cabinet repair option is time-consuming, but can also make your kitchen look like new.
Pros of Refinishing Your Cabinets Include:
- Creating a traditional, natural look.
- Supplies will cost you less than painting your cabinets.
- DIY mistakes are more forgiving.
- Hides dirt better than painted cabinets.
- Lasts longer than painted cabinets.
- Easier to wash.
- Less prone to cracking.
- Showcases the natural wood-grain of your cabinets.
- The classic and natural look could benefit the resale value of your home.
Cons of Refinishing Your Cabinets Include:
- Stained wood cabinets are less resistant to water than painted cabinets.
- Shows dust more than painted cabinets.
- Harsh cleaners can dull the finish.
- Harder to remove stains if your refinished cabinets are not cleaned right away.
THE PROS AND CONS OF PAINTING YOUR CABINETS
Maybe you would prefer a sleeker and more streamlined look in your kitchen compared to the more traditional aesthetic of staining your cabinets. Instead of refinishing them, consider painting your old cupboards instead.
Pros of Painting Your Cabinets:
- Creates a smooth, modern look.
- Paint has more color options than staining cabinets.
- Hides dust more than stained cabinets.
- Can apply a top coat to make cleaning easier.
- Neutral colors add to the resale value of your home.
Cons of Painting Your Cabinets:
- More expensive than staining your cabinets.
- Can be more time-consuming.
- Mistakes show more easily.
- Paint lasts less than staining.
- More prone to cracks and chipping.
- It’s more difficult to touch-up painted cabinets.
- Bold colors can detract from the resale value of your home.
How to Refinish and Paint Your Cabinets
If painting or refinishing your cabinets sounds like the right option for your home, follow these steps to give your kitchen cupboards a boost of vigor. Both painting and staining follow a very similar process.
Alternatively, if you are not much of a DIYer, get in touch with the pros at Mr. Handyman Dallas and we will paint your cabinets for you.
1. Ascertain what kind of paint or stain you will need. Depending on what material your cabinets are made out of, you will need different types of paint. For example, metal and wood are easy to paint over with a standard water-based paint, but plastic laminate cabinets require special paints. Likewise, stain will only work on wood cabinets. Be sure to do a patch test on your cabinets first to ensure you have chosen the right color of paint or stain.
2. Label each cabinet door. Before removing your cupboard doors, label them to save you time when you have to put everything back.
2. Remove cabinet doors and hardware. We advise that you do not paint your cabinet doors inside. Rather, move them to a well-ventilated area like your backyard or deck.
3. Clean the cabinets thoroughly. It’s very important to paint your cabinets on a clean surface—especially since the kitchen is one of the areas of your home that has the most grime build-up due to grease, oils and food splatters.
4. Allow cupboard doors to dry completely. Before you proceed to sanding your cabinet doors, they must be completely dry.
5. Sand the surfaces. Lightly sanding your cupboard doors will prepare them for painting or staining. Sanding your cupboard doors will remove any existing paint or stain, smooth out scratches and ensure the paint/stain bonds properly with the cabinet surface.
6. Wipe away the residual sand. Sanding can be quite messy, and before you apply your paint or primer you will need to wipe down your cabinet doors thoroughly.
If you are painting your cabinet doors:
7. Apply the primer. Applying an even coat of primer will help your cabinet’s paint job stay even. Additionally, primer helps paint bond to your prepared cupboard doors.
8. Paint your cupboard doors. Once the primer has dried, you are ready to paint your cabinet doors. Be sure to paint carefully and evenly. The best practice is to apply the paint in multiple thin layers until you have reached your desired coverage.
9. Allow the paint to dry completely. Before reinstalling your newly painted cupboard doors, be sure they have completely dried.
OR If you are staining your cabinet doors:
7. Use a rag to apply the stain. Using a rag will help you work the stain into the grain of the wood. Be sure to wipe away any excess stain. Keep staining until you have reached your desired color and have applied the stain evenly.
8. Apply a polyurethane sealer. This will maintain your newly applied stain and prevent other liquids from damaging the wood. It’s best to apply two coats of sealer and allow the cabinets to dry completely before each coat. Once your final coat has been applied and the cupboard doors are completely dried, you may reinstall them.
Call the Pros at Mr. Handyman Dallas
Are your kitchen cupboards in desperate need of repair? Perhaps after reading this article you feel ready to tackle a DIY cabinet repair job on your own. However, if you would rather the experts at Mr. Handyman Dallas handle your cabinet repair needs instead, be sure to give us a call at 972-627-4518 or request a service today.