Radiant Barrier Costs vs Savings Comparison Guide (Diy, Pro, Alternative)
Originally posted on https://powersolarphoenix.com/radiant-barrier-costs-diy-pro-alternative/
Were you just searching Google for the words “radiant barrier cost“, “radiant barrier comparison“ or “attic radiant barrier installation cost” in 2018-2019 and found this article?
If so, your mind might be blown by the time you are done reading this! We put together an incredible amount of research to show you the actual cost to install attic radiant barrier insulation versus how much you actually save after installation. We also compare radiant barrier installation methods DIY, Professional and Alternative.
In this guide we cover:
- (GOOD) DIY Radiant Barrier Comparison | Cost VS. Savings
- (BETTER) Professional Radiant Barrier Comparison | Cost VS. Savings
- (BEST) Alternative Radiant Barrier Comparison | Cost VS. Savings
Take a look at the DIY vs PRO vs SRX radiant barrier installation cost vs savings graph we put together below. Read the complete breakdown of each type of installation method below in the text. The graph provides a general overview of what is talked about on this page.

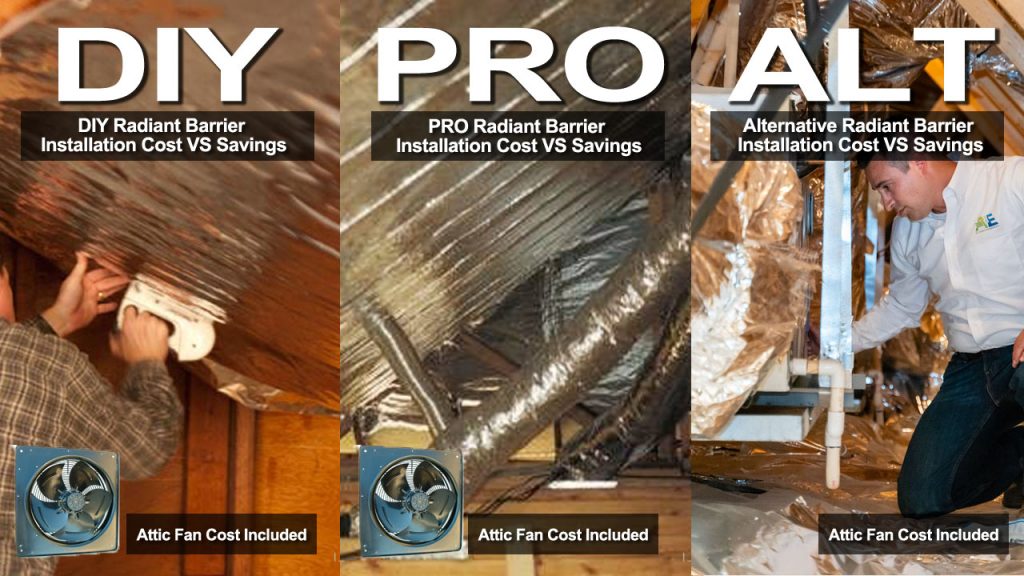
(GOOD) DIY Radiant Barrier Comparison | Costs VS Savings
You can go right out to home depot and buy some reflective radiant barrier material for a cheap price and choose to install radiant barrier yourself (DIY). Although, you might be surprised how many steps are actually involved and how many people you should have helping you. In this “how to install radiant barrier” guide provided by Radiant Guard recommends having at least 3 people helping you install and recommends setting 3 days to the side for the installation time. Then you must be wary of gas homes and approved installation methods. The warranty on these products varies greatly from 2 years to 22 years.
DIY Radiant Barrier Material Costs
Radiant barrier material can be pretty cheap as long as you are buying it in bulk. The costs drastically increase as you purchase smaller amounts of material.
- Single sided radiant barrier roll: $0.10 to $0.25 per sq. ft.
- Double-sided radiant barrier roll: $0.15 to $0.50 per sq. ft.
- Anything less than a roll will cost: $0.75 to $1.00 per sq. ft.
DIY Radiant Barrier Installation Cost Per Square Foot
You can save money by installing radiant barrier yourself but you are still going to pay a pretty penny and there is a lot of work involved.
- Even DIY radiant barrier installation is still going to cost you around $.10 to $.30 per square foot.
- Cost to install radiant barrier in a 1500 square foot home: $150 to $450
DIY Attic Fan Installation Cost
Yes, any radiant barrier installation needs to be accompanied by an attic fan installation to get rid of the heat. That heat has to get out of your attic to keep your home cool. Attic fans cost around $112 to $220 depending on the type of attic fan you buy. Lowe’s has an attic fan installation guide that shows you step by step what materials you will need for installation and has attic fans you can buy online. Installing a fan is a great idea, however, you must consider the entirety of the attic when venting a space that large.
You have to have a fan large enough to pull air from the right part of the house and blow it out the correct side of the house with a fan. Some homes require 2 fans, strategically placed on the roof. Pretty much all venting holes whirly birds must be sealed up and the only vents that stay open are on the cool side of the home. The fan must also be accompanied by a temperature control switch which will turn the fan on when the attic reaches a certain temperature you set. An electrician must wire this up at a rate of $150/hr it should take 2 hours. Final cost $520
Total DIY Radiant Barrier Comparison | Cost VS Savings
- Total DIY Radiant Barrier Installation Costs W/ Attic Fan: $1,120
Keep in mind, in order to get this price you must be very savvy with electrical and active venting solutions. 95% of homeowners will not be able to install a roof mounted attic fan with temp switch or proper venting.
Total DIY Savings Over The Next 25 Years
- 25 year estimated savings from DIY Radiant Barrier: $9,000
You are going to save the most money on the installation of items. Although, the savings you receive from radiant barrier aren’t all that fantastic. Even the best double-sided radiant barrier material is only going to save you around 15% on your heating and cooling bills. Unfortunately, that is short-lived and all these radiant barrier products lose their effectiveness after a couple of years rendering them useless.
Most attic fans are loud and have to be replaced every few years. The estimated savings for a DIY project over the next 25 years is very little actually. Once you consider the cost to savings it really doesn’t make sense. Best case scenario is that you save 15% off your electric cost. Example: Your average bill today is $200, Save 15%, that’s $30/mo. If you paid $3,470 for this upgrade, it would take you 10 years to recoup the cost for one and by then, None of these products will be working or would have already been replaced.
(BETTER) Professional Radiant Barrier Comparison | Costs VS Savings
![]()
A radiant barrier is very popular and experts suggest having a professional install your reflective material for you. However, new discoveries have shown that radiant barrier isn’t the best type of reflective material for your home anymore. There is a new patented product that has emerged called (SRX) SuperReflex and it is known as the “Best Radiant Barrier In The World”! But, let’s take a look at how much professional radiant barrier costs and how the savings stack up first before we go any further into SRX. Keep in mind that not all installations are the same method because most companies have no clue how science works behind a proper installation of reflective products.
BUYER BEWARE: Most companies who install radiant barrier will staple or attach it to the underside of the roof which will heat your roofing tar an additional 15 degrees hotter in the summer which will decrease the life of your roof dramatically. This installation also creates a solar oven in your attic without proper fans installed it will literally heat up your attic space increasing home discomfort and utility costs. The final warning about this way of installation is the amount of time these companies are in your attic stapling. I have heard it could take up to 3 weeks for a complete install. This will drive up the cost. Also, you can never remove this product because of this and can not take it with you like you if you move. Here is your breakdown for a professional to install a quality radiant barrier product.
Professional Radiant Barrier Material Costs
Material costs will be included with installation for professional radiant barrier installs.
Professional Radiant Barrier Installation Cost Per Square Foot
Prices below include installation of radiant barrier material only. This does not include the attic fan installation costs.
- Single Sided Radiant Barrier Material: Professional single sided radiant barrier material installation is going to cost you around $.20 to $.30 per square foot depending on the quality of reflective material they install.
- Double Sided Radiant Barrier Material: Professional single sided radiant barrier material installation is going to cost you around $.40 to $1.50 per square foot depending on the quality of reflective material they install. Radiant Barrier Total cost: $1,425
Professional Attic Fan Installation Costs
- To have an attic fan installed by a professional will cost an average of $545, including fan installation and other labor.
Depending on the type of attic fan you choose (electric attic fan, solar attic fans, etc.), the location it’s in, and any other add-ons you might want, your professionally installed attic fan could cost anywhere from $200, to $1,200 (some actually charge upwards of $4-5000). Cost: $700
Total Pro Radiant Barrier Comparison | Cost VS Savings
- Total PRO Radiant Barrier Installation Costs W/ Attic Fan: $2,125
Total Pro Install Savings Over The Next 25 Years
- 25 year estimated savings from Professional Radiant Barrier: $9,000
Pro installs save a little more money than DIY but the savings you receive from radiant barrier still aren’t all that fantastic. Even the best pro installation of radiant barrier material is only going to save you around 15% – 25% on your heating and cooling bills. Even the top site that ranks for “radiant barrier savings” says a pro install of current radiant barrier technology will only save you 17% on heating and cooling bills. Our SRX product can save you far more than that!! Read more below.
(BEST) Alternative SRX Installation Comparison | Costs VS Savings
Professional SRX (best radiant barrier in the world) installation is going to cost you around $.33 to $2.00 per square foot
SRX Material Costs
Material costs will be included with installation for SRX installs.
Professional Radiant Barrier Installation Cost Per Square Foot
Prices below include installation of radiant barrier material only. This does not include the attic fan installation costs.
- Single Sided Radiant Barrier Material: Professional single sided radiant barrier material installation is going to cost you around $.20 to $.30 per square foot depending on the quality of reflective material they install.
- Double Sided Radiant Barrier Material: Professional single sided radiant barrier material installation is going to cost you around $1.60 to $2.50 per square foot depending on the intricacy of the installation. Cost: $3,000
Professional Attic Fan Installation Costs
To have an attic fan installed by a professional will cost an average of $545, including fan installation and other labor. Depending on the type of attic fan you choose (electric attic fan, solar attic fans etc.), the location it’s in, and any other add-ons you might want, SRX is only installed with the highest quality German engineered fans so your professionally installed attic fan could cost anywhere from $500, to $1,400.
Total SRX Alternative Radiant Barrier Comparison | Cost VS Savings
Total SRX Alternative Radiant Barrier Installation Costs Including Attic Fan: $3,950
Total SRX Install Savings Over The Next 25 Years
- 25 year estimated savings from SRX Radiant Barrier Alternative: $20,000+ Bonuses
SRX is going to save you more money than any other radiant barrier material in the world. Plus, our German attic fans work is far superior to solar attic fans which need maintenance in as little as 2 years. We don’t ever want you to have to guess how much you are going to save by installing our radiant barrier alternative (SRX) and how much it is going to cost to install it.
Additional Bonuses W/ SRX
- Double the life of your A/c unit(s)(big expense you can prolong)
- Turn your home into a “thermos” making it very comfortable by making every room the same temperature. Get rid of hot rooms forever.
- Your A/c only comes on every once in a while instead of every 15 minutes.
- Prolong your roof’s life (another expense you can put off)
- $0 Down financing allows this to be the most attractive offer on the market. For nothing out of pocket and starting at $50/mo (varies on usage), You can save immediately upon installation.
- Product is guaranteed and warrantied for life.
- Installation is easy and takes less than a day.
- Take it with you if you move!!
That’s not all. The typical SRX installation comes with smart home perk package. This will turn your average home into a super smart energy efficient green home. Access everything from your smart device. Here are some of the perks that come with SRX installation. With these extra perks, you can save up to a whopping 60% on your electric bill immediately. Your house will be more comfortable that you could have ever imagined.
DIY Smart Home monitoring System Cost
Systems range anywhere from $250 – $3000. They require an electrician to install at whatever rate they charge. A typical Electrician can charge up to $150/hr and it may take two hours. We will say this can be an average cost of $1500
DIY Wifi Thermostats and programmable timers, and sensors. On a typical home, you can expect to spend about $250 for the thermostat, $75 per timer. Usually, an electrician installs a thermostat for around the cost of the unit and about $50 to install each timer. This will run a homeowner about $1,000. Then the homeowner must figure out how to set all of their loads to maximize their savings based on their price plan through the utility company. Very difficult to figure out for most people and frustrating.Lighting sensors and remote control lighting control systems.
With the right Utility company rate plan and one of our energy professionals setting up your smart home, your electric costs will just drop significantly and you won’t have to worry about a thing.
Want To Learn More About Our Amazing Radiant Barrier Alternative Product?
Want to learn how to save up to 50% on electricity or more about our amazing SRX product? Learn More About the best Radiant Barrier Alternative Insulation in the world Here.