DIY Personalized Christmas Bags
Originally posted on https://diydanielle.com/personalized-christmas-bags/
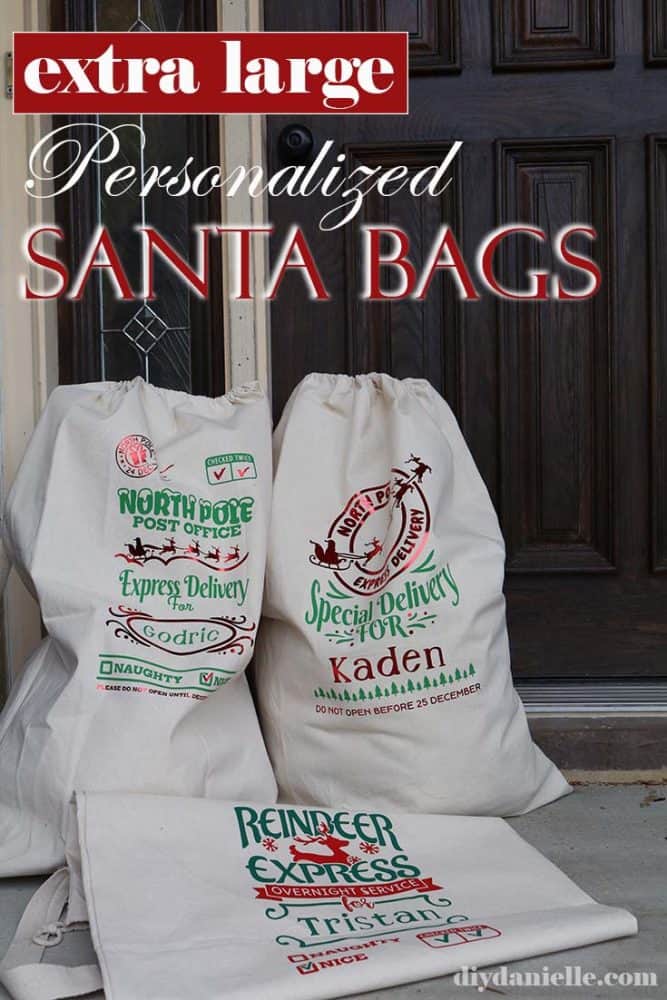
DIY Personalized Christmas Bags. Learn how to make extra large Santa sacks that will fit toys better than the small bags you often see in stores.
This post contains affiliate links. If you make a purchase using those links, I may receive a commission. This does not impact your price for the product. Some of my projects use power tools or other items that can be dangerous. Please DIY carefully or hire someone who can. You can review my full legal disclosures here.
This is a sponsored post written by me on behalf of BagzDepot, your source for bulk blank santa sacks and totes. All opinions are 100% mine.
A few years ago, I made some cute small Santa bags, but they’re soooo small! When I bought them, they were pre-printed with everything but the child’s name so it didn’t leave much room for creativity either.
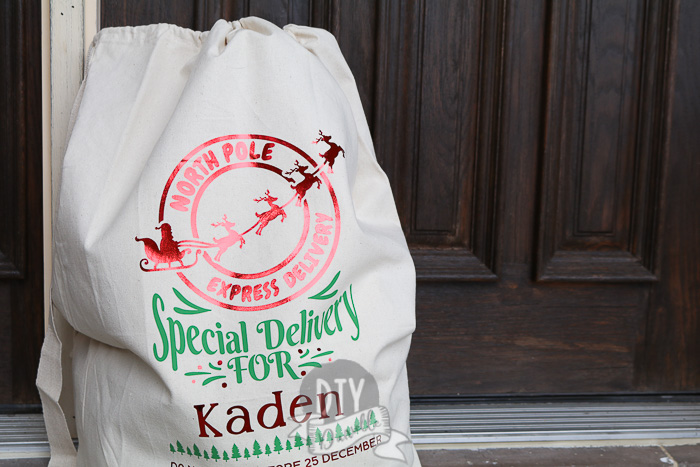
When I saw the large canvas laundry bags on BagzDepot, I got realllllly excited about all of the possibilities! They would hold medium and large gifts, and I’d be able to completely customize them. The bags come in red, blue, and tan, but I went with tan so the words would be easy to read- to be honest though, it was a tough choice. The red would have been awesome too!
They’re PERFECT for use with my Cricut!
This is going to be a super in-depth tutorial on how to apply HTV (iron on vinyl) to a 100% canvas bag. It’s a good one if you’re new to your Cricut.
Supplies
- Canvas Laundry Bags
- SVG files from Etsy
- Cricut Air 2 or the Cricut Maker

- Cutting mat
- Weeding tool
- Cricut EasyPress with the Pressing Pillow Underneath
- Teflon Sheet
- Heat Transfer Vinyl
How to Convert the SVG File from Etsy for Use on Your Cricut
This is pretty easy to do. I show the process in my video, but don’t have any photos.
Purchase your file on Etsy. You’ll receive an email saying your file is ready. Download the file and unzip it. You’ll see there’s quite a few options for your bags. Pick the ones you like best and remember/write down the number name for the file.
Go to Cricut Design Space. Click new project. Hit “upload” on the bottom of your left side bar. Click “upload image” and select your file. You should have a folder just for SVG files. Click the image, open, save. This will bring you back to your “recently uploaded images” section. Select the image you’re using.
I recommend working with just one bag image at a time. It’s less confusing.
How to Get the Image Cut Properly Through Design Space
Resizing the Image and Adding the Name
First- before you choose one of the methods below- you want to resize your image to the size you want it to be on your bag. I resized the height to 11.5″ or thereabouts. That means it’ll stay on a 12×12 sheet/mat. You can go larger if you want to use a 24″ piece of iron on and a 24″ mat. I like this size though. You can resize by selecting the whole image and changing the height on the top menu bar.
Once it’s resized, you can add your child’s name in the font you want. Pick a color for it. I prefer to use one of the colors in the file already.
Manipulating the SVG File
Method 1: Grouping all of the same colored items so you can apply it in one section.
The benefit to this is that it’s easier to apply it. You don’t need to do much to lay out the image, besides lining up your layers (colors) properly and making sure the image is centered. The downfall is that you waste a lot more HTV.
When you open the file, you’ll notice that each section is grouped (check out the right side bar). This just means when you click and move them, those sections that are grouped move together. It’s convenient for increasing the image size.
You can click the group and click “ungroup” to ungroup them. This ungroups the red and green.
You’re left with two groups- red group, green group, then the name. I click the child’s name and the colored group that matches it, and group his name. Click both and click “group.”
Once you have it separated by green group and red group, you can click the green group and click ATTACH. This keeps all of those designs together when you go to cut the iron on vinyl so it prints all as one bunch.
Now click the red group and click ATTACH.
You’re done manipulating the file now. Skip to “Cutting the HTV.”
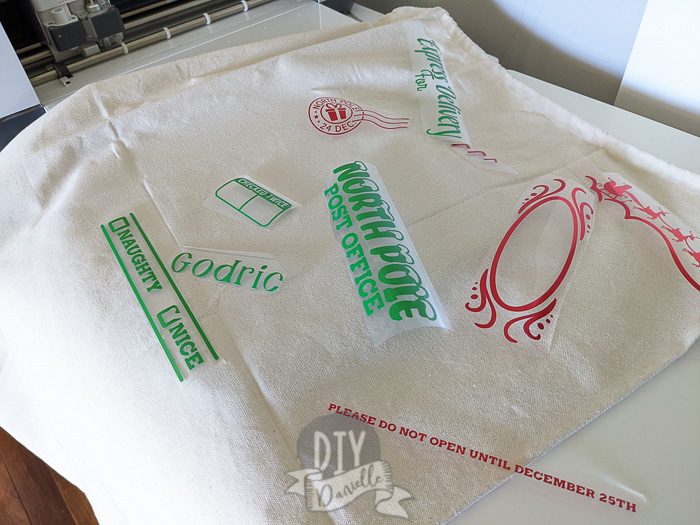
Method 2: Ungrouping everything and grouping in smaller sections
This is a great way to use less HTV and you have more control over the spacing of your images. You can get a bit more creative.
I like this method best. Start by ungrouping the whole image.
Move the red group to one side. This separates your green and red to make it easier for you to move everything around. Move the name near the coordinating color.
Now you can ungroup red and ungroup green.
At this point, you can decide how to group the parts you want to cut together. I always group a line of text together and anything that will be hard to individually apply. Select the items you want together, click GROUP, then click ATTACH.
Repeat for every section… it’s a bit of work, but it’s pretty fast and saves you HTV.
Cutting the HTV
At this point, you’re ready to cut your HTV. Place your first color HTV (the one on the top of your left side bar- make sure that one is selected.. you can click the other one if you want to print that color first) shiny side down on your cutting mat, rubbing out any bubbles. Place in your machine, press the double arrows button (the load button).
On Design Space, hit Make It. You should see a red sheet and a green sheet on the left side bar. Make sure the vinyl is cutting just how you want.
Click the MIRROR button on each sheet. DO NOT FORGET THIS STEP.
Now you can hit continue.
Connect your device and select it.
Select your material from the list.
Make sure you have the correct blade in your machine.
Press the Cricut button on your machine to start cutting.
How to Apply HTV to a DIY Santa Sack
This sack is 100% cotton, but it’s a thicker canvas so you don’t want to use the regular cotton setting for applying the iron on. Make sure to visit Cricut’s heat guide for the most current instructions for your iron on vinyl and fabric type if you’re using their iron on and machine.
I am going to talk about MY settings and process for Every Day Iron On using a Cricut EasyPress (1st one) with a pressing pillow, as well as Foil Iron On, on 100% cotton canvas.
The settings are different if you use a different Easypress or different iron on!
Every Day Iron On
Preheat your EasyPress to 340 F. Place your pressing pillow inside the bag, under where your design will go.
Once preheated, prep the area by preheating it for 5 seconds.
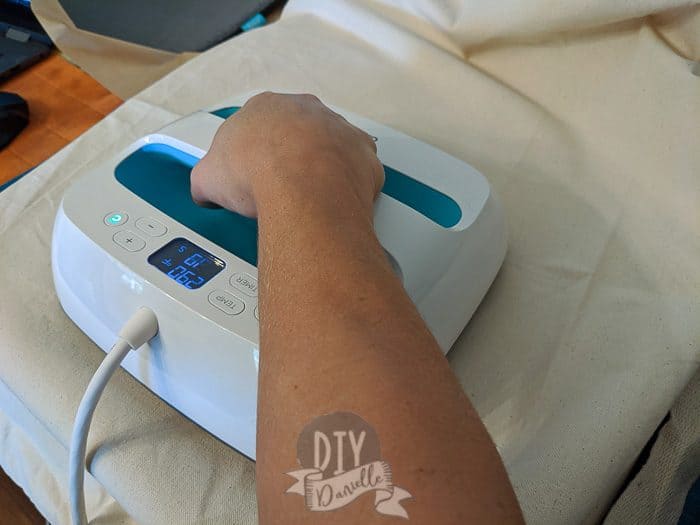
Lay out your iron on vinyl in the positions you want. Make sure it’s centered. You want to do one color at a time (you can’t overlap the shiny plastic sheets).
You may be able to do multiple colors at a time if you used Method 2 for cutting your iron on AND use the same type of iron on vinyl for both colors.
The important thing is that there isn’t a clear shiny sheet blocking your iron on from going onto the bag.
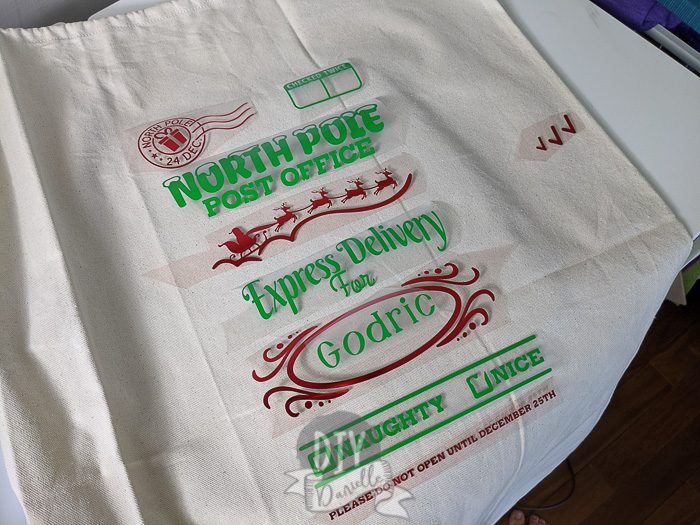 I laid this out for the purposes of getting it all in the right position, but because the red was foil, I needed to press it at a different temperature. I removed the red, pressed the green, then pressed the red after. The check marks need to be applied last, after the other pieces are pressed.
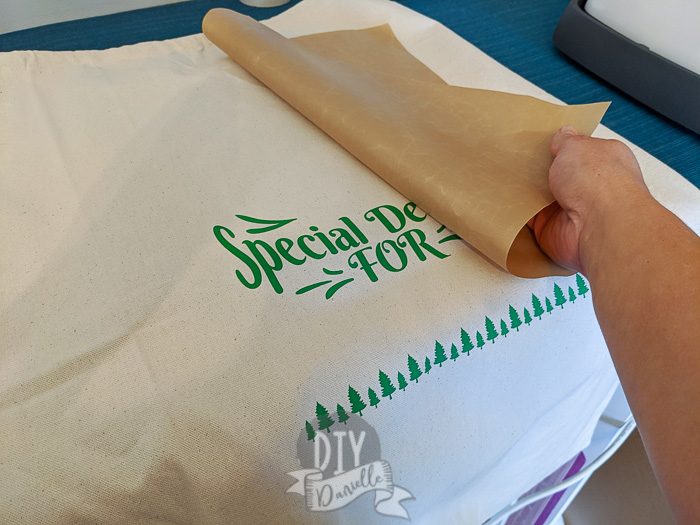
Place your Teflon sheet over the iron on vinyl. Press with your EasyPress for 30 seconds using light pressure (push down on the press). Make sure your distribute your pressure as evenly as possible. Any area that the press doesn’t touch will need to be pressed separately.
Remove the Teflon sheet.
Flip your bag over (moving the pressing pillow) and iron the opposite side of your design (the inside of the bag) for 15 seconds.
Flip the bag over again so the design is right sides up. Wait a few seconds for it to cool a bit… you can warm peel this (peel it off while it’s still hot), but you don’t want to burn your fingers.
Test to see if the clear sheet over the HTV pulls up easily. If it doesn’t, you’ll need to repeat the process. The Every Day iron on was pretty cooperative for me with these settings- the plastic sheet pretty much removed itself.
The main issue is that your design is large so you’ll need to make sure you press each section.
I will often peel the backing off, put the Teflon sheet back over the design, and press again. I like to make sure it will stick on there. Just make sure not to melt your HTV… I usually let everything cool down before I do this and DON’T let your EasyPress touch the HTV without something in between.
Foil Iron On
The foil iron on has pretty much the same process, but the temperature setting is different. The setting for my supplies and equipment is 290 F.
It’s also a cold peel which means you need to press it, let it cool completely, THEN remove the plastic piece.
Here’s a video to show the whole process!
Originally posted on YouTube by DIYDanielle
Blank Santa Sacks
If you want to get blanks to make Santa sacks for yourself or others, I highly recommend checking out BagzDepot.com. You can order in bulk and the size on these laundry bags is perfect (note there’s a small and medium laundry bag too- get the large).
They even carry the bags in red or blue. If you don’t make them for other people and don’t think you want the minimum order quantity, get together with friends to do the order! You could even host a party for everyone to make their own.
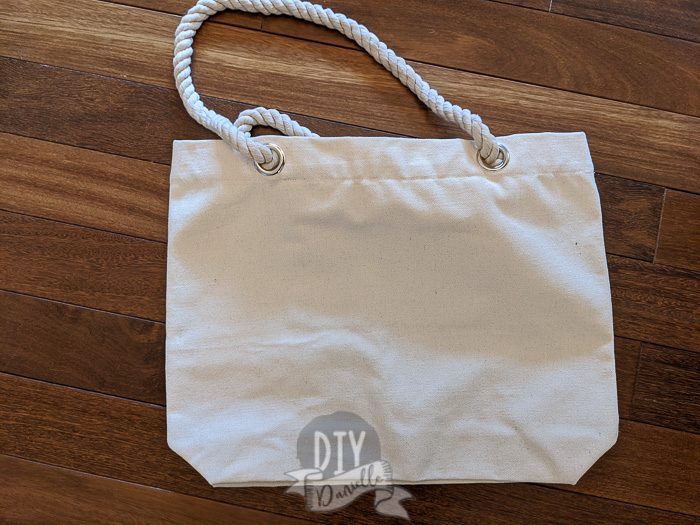
Bagz Depot also sent me these super fun canvas tote bags with rope handles. They have a magnetic clasp and a zippered pocket inside. Still trying to figure out how to best use them- I’m thinking of filling them with goodies and decorating the exterior with HTV to gift to a friend. Any clever ideas?
Please share and pin this post! If you make this project, share it in our Stuff Mama Makes Facebook Group in order to enter to win our monthly giveaway.