How to Throw a Cast Net Instructions Video
Learning how to throw a cast net is just like learning to ride a bike. At first it is awkward but you will learn fast with these how to throw a cast net instructions. You will look back and wonder why you had so much trouble throwing a cast net.
You will soon be the hero not only by cast netting live bait easily but also by teaching others how to throw cast nets effectively. Learning how to throw a cast net is 80% loading it in your hands correctly because the remaining 20% is simply throwing weight forward with energy.
Make sure that you throw almost all of your energy into your lead hand (not your following hand). You should be superman saving the cast net day year after year by cast netting loads and loads of your own live bait!
HOW TO THROW A CAST NET
“INSTRUCTIONS”
Throwing Cast Nets 6ft and Larger

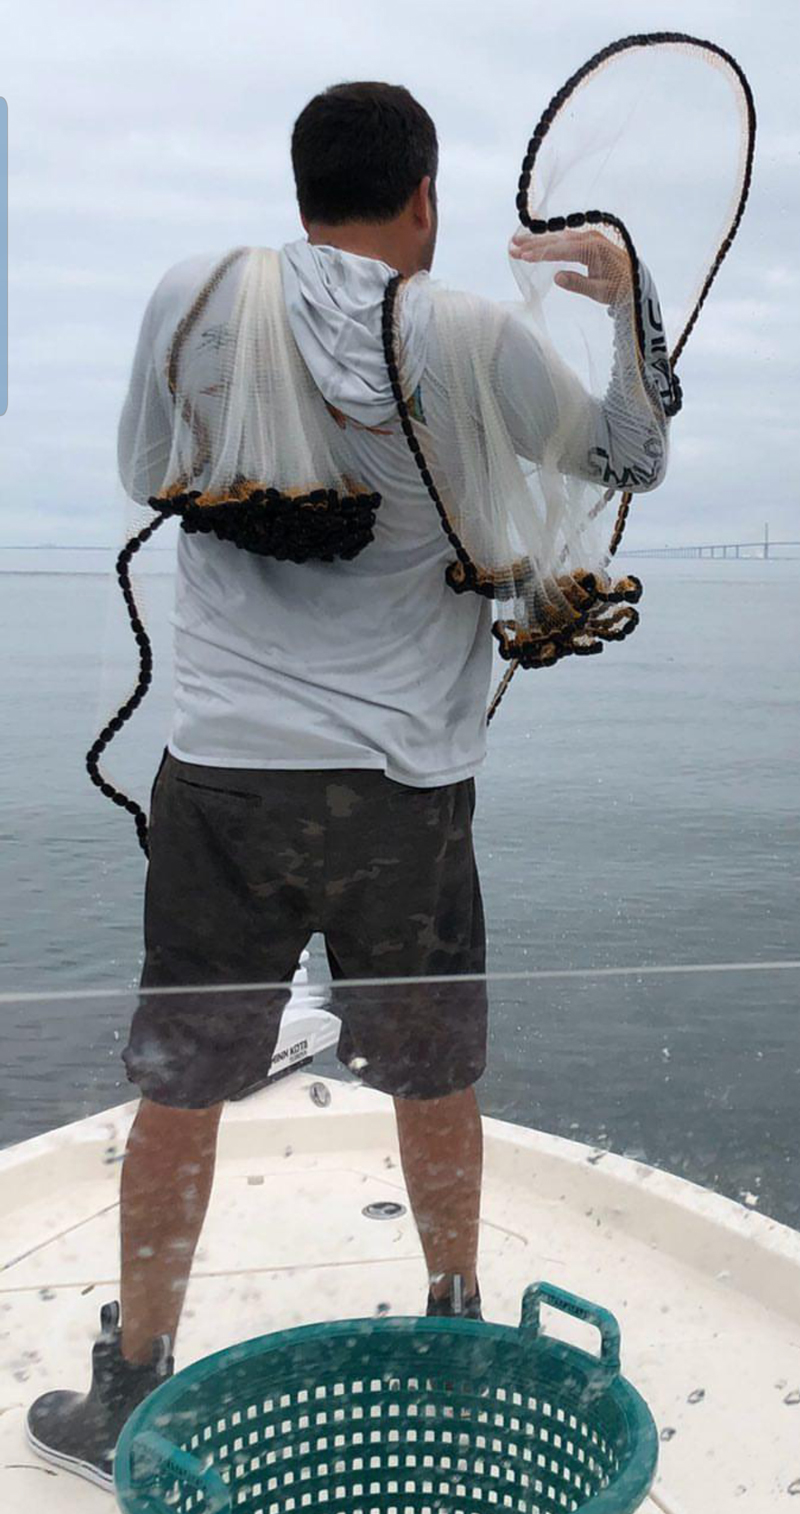
Place the cast net handline loop around your left wrist. Coil your handline in your left hand which should be approx. 20-30 ft in length. Grab the cast net at approx. 18″-24″ below the horn because this makes the net smaller. Example: Grab 2 ft below the horn on a 10 ft net. This makes a 10 ft net only 8 ft in length and easier to handle the netting.

Again, with your left hand, grab approximately the middle of the net so that you will have the net looping in a circle type shape and it being doubled in your hand. Your left hand/arm should be relaxed at your side while holding the net. The lead on the cast net remains on the ground but minimal slack in the netting is left hanging. This is important because it gives you much more control. This also important because it makes it much easier to throw.

Hold the cast net outward from your body and let the net come to a stop, otherwise your net will not be centered. Most of the time it will twist around a half a turn before the cast net reaches its relaxed position. At this point, with your right hand, you will grab the rear leadline of the cast net because this is the point closest to your stomach. Grab this leadline and put the rope portion of the net in your teeth, not the lead because lead it can harm your teeth, etc.

With your right hand, stick it inside of your cast net, palm up and fan portions of the cast net. Fan until you reach almost 50% of the net over to the right side of your hand. This is because you want the net even on both sides. An evenly divided cast net is important because your net will throw much easier.

Slide your right palm up within 12″ of your left hand while your hand remains inside of the net. Grab all 50% of the net which is to the right of your right hand. You should now have half of the cast net in your left hand and the other right half of the cast net in your right hand.

Your your right hand should be palm up and holding this 50% of the cast net. You will need to use your pointer finger and thumb from your right hand. Grab the leadline and squeeze it between these two fingers. The leadline should be just a few inches from your right hand and dangling next to it. You will be grabbing this leadline with your pointer finger and thumb. At this point you should have the leadline still in your mouth which runs to your left hand and also to your right hand fingers. Both hands should have 50% of the cast net in each hand. Your right hand should be holding 50% of the cast net in the palm of your hand with 3 fingers squeezing this portion. The leadline should be between your remaining two fingers which are your pointer finger and thumb, palm up.

You are now ready to throw your cast net. Only your right side of your shoulder should be facing your target and the front of your body should be facing left of your target. Your feet should be shoulder width apart or slightly wider.

Extend both of your arms away from your body, while keeping your feet stationary. Rotate both portions of the cast net in both hands to your left until the cast nets’ motion is stopped at your back. As the cast net starts to relax and come forward with natural momentum, start accelerating both hands forward in the direction of your target. This should be directly to the side of your right shoulder. Both hands should now start accelerating forward, lead with your right hand and put much more energy and force into your right hand. Put more energy in your right hand because this causes your lead hand to cast further and faster than your left side portion. This step will cause the cast net to spread and separate from each portion much better. When throwing your cast net toward your target, lead your right hand slightly to the right of your target. Your left hand should follow with it being slightly to the left of your target. This causes these two portions of the cast net to pull against each other for maximum spread. This centers your target between these two portions of netting being thrown.

As you are leading with your right hand, the last piece of cast net that will leave your hand should be the leadline piece. This is between your thumb and your pointer finger. You should hold on to this portion for approx. 1 second after you feel the rest of the cast net starting to pull against it. This pulls against the other two portions of the cast net which causes your net to spread out much more evenly. A cast net has 3 basic focus points for determining whether or not that a net will open correctly. Focus point 1 is the portion of net in your right hand that you’re leading with. The Focus point 2 is the portion of net in your left hand which follows your leading hand. Lastly, Focus point 3 is the rear of the net which is held between your pointer finger and thumb. This gives your cast net a total of three evenly spread focus points in which the net should be pulling evenly on each other. Finally, this will cause a perfect and fully spread circle because you have followed these cast net throwing tips. If one of these focus points are missed, you’ll most likely experience an oval or kidney shaped throw. This is due to one of these points not pulling evenly enough from any of the other focus points.
i
Cast Net Throwing Tip
You may substitute the mouth step by draping this portion of netting over your left shoulder, approx 12″-18″. You’ll want just enough net to drape over your left shoulder without falling off during your cast net throwing motion. This is a great way for learning and throwing what we call a “Flop Cast”, also known as Triple Load. This Flop Cast name is because your distance will be limited due to the portion being on your shoulder. This cast net throwing technique is great because it has a great pulling power focus point.
By using this technique, this will naturally pull on the remaining two focus points without you remembering to do so. This cast net throwing method will probably become one of your favorite style of throws for casting your net short distances. Practice by following these how to throw a cast net instructions. You will get the hang of throwing your cast net quickly. This enables the cast net to spread fully in a much tighter spread when flopping the cast net to its maximum size. This works extremely well when live bait are directly next to the boat.
For more information on Why to throw a Black Pearl Cast Net? Click Here https://www.blackpearlcastnets.com/why-black-pearl-cast-nets/