How to Seal Galvanized Pipe Fittings
Whether you are just fixing your sink or installing an additional bathroom, you want to know that the water flowing through the pipes will stay in the pipes. Plumbing can be a messy process when performed incorrectly.
However, it is not as daunting a task as it may seem. Stay tuned to find out how you can seal galvanized pipe fittings and avoid potential damage.
Galvanized Pipe Fittings | Sealants
First, let’s discuss what types of bonding material you should be using. You won’t have the right kind of water-tight seal if you aren’t using the correct sealant.
The two main players here are Teflon tape and a Teflon-based compound. The goal of these products is to take up any gap that may be left in the threads where the pipes thread into the galvanized pipe fittings.
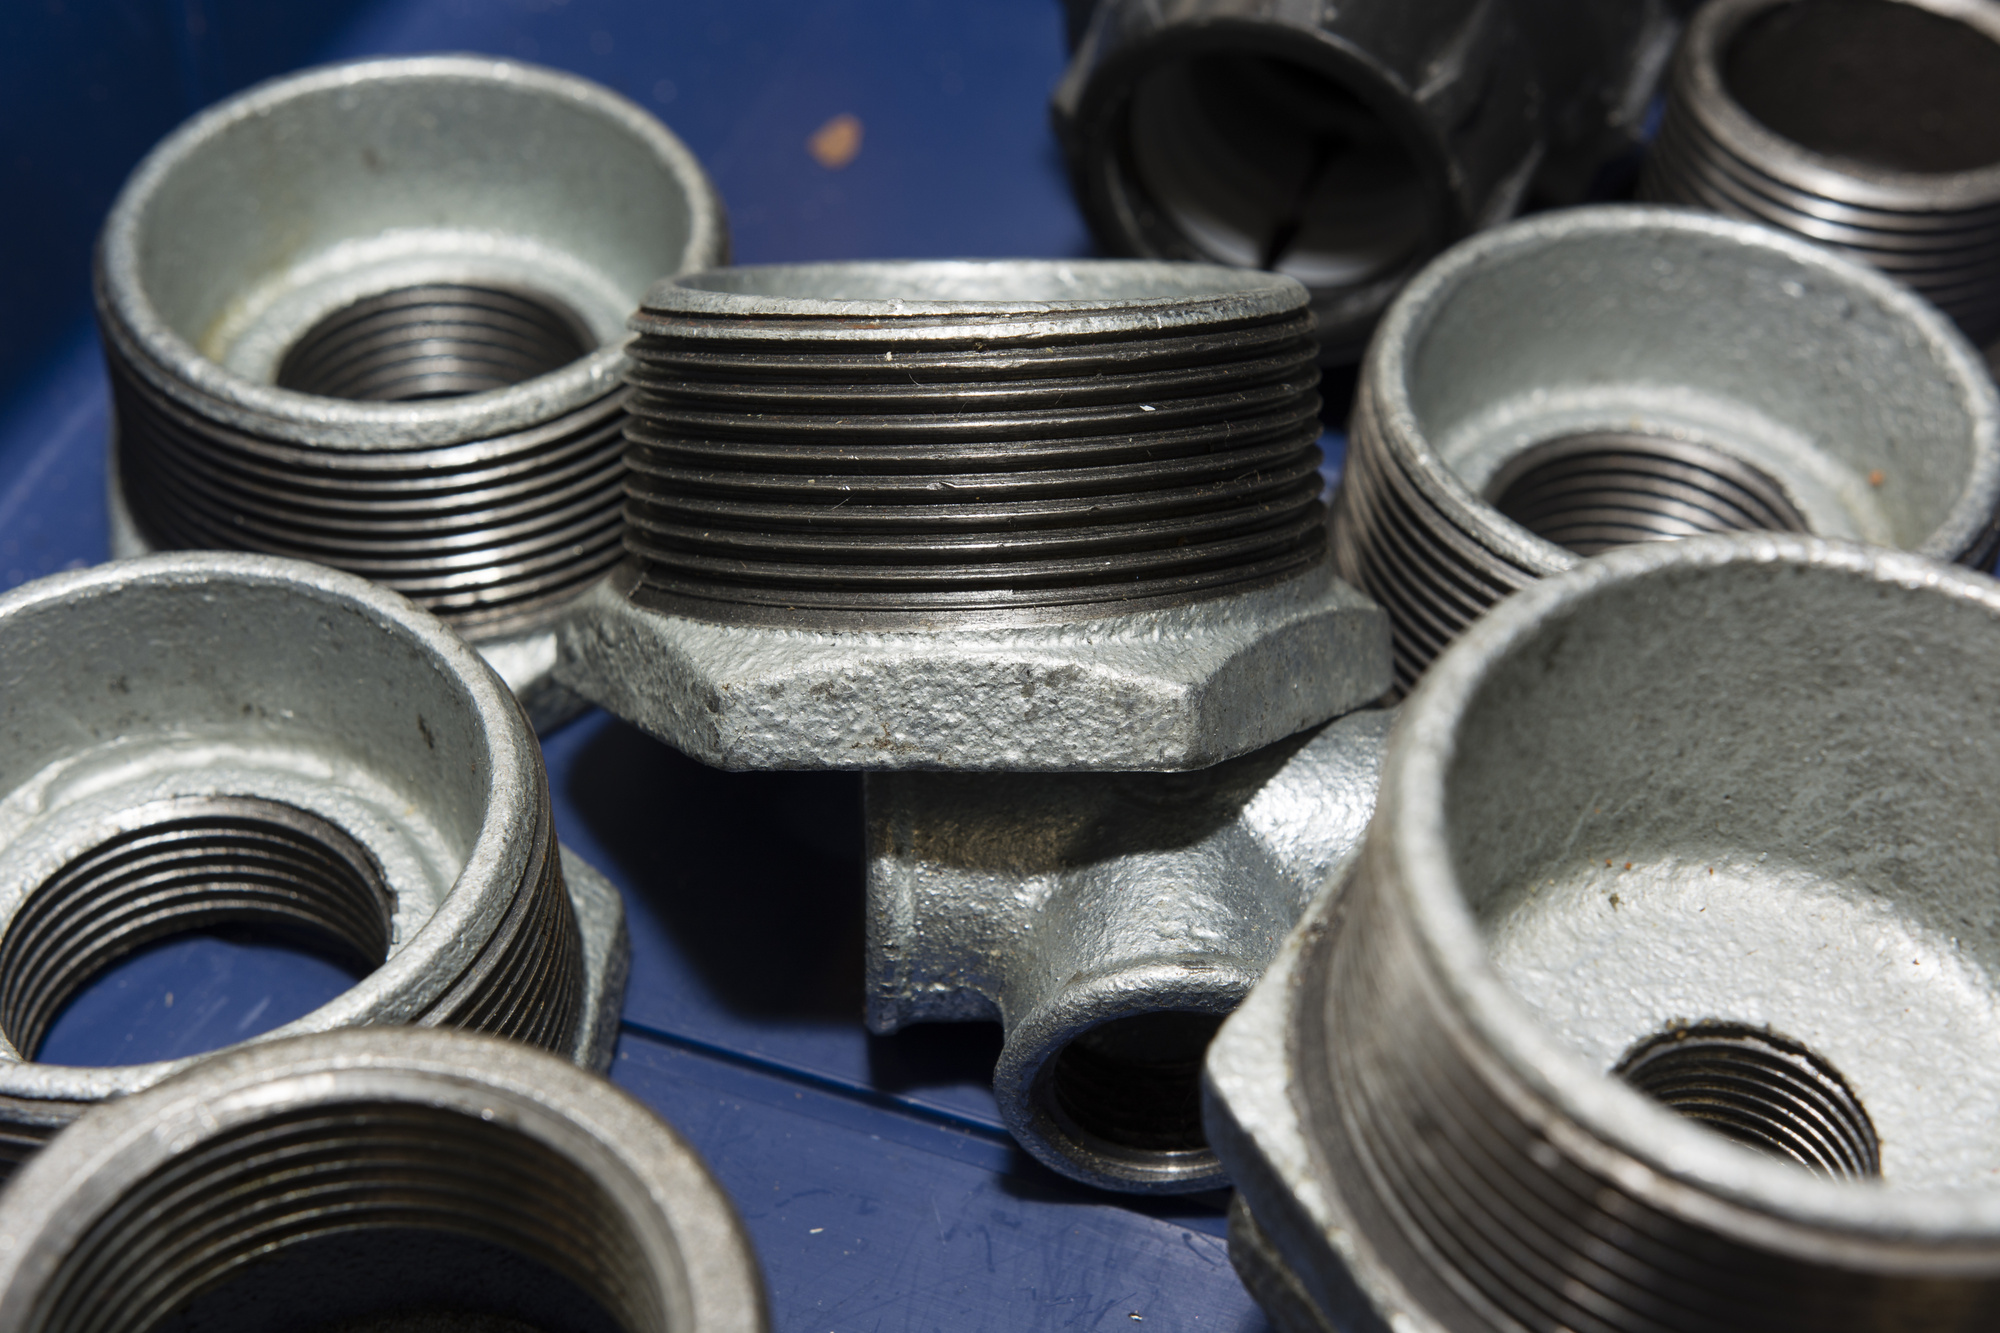
You see, these fittings such as these are not like a typical nut and bolt. Galvanized pipe fittings are actually slightly conical. This means that when threaded together, they will fit together like two cups stacked together in a cabinet. The purpose of this conical shape is to create a tighter seal the farther the galvanized pipes are screwed into the fittings.
The tape or compound you use will act as a coating on these threads and be the last line of defense against leaks. Let’s look at the differences between the products. Let’s take a deeper look at these two sealing materials:
Teflon Tape
Teflon tape is a clean and inexpensive choice when it comes to sealing your galvanized pipe fittings. The application process is quite simple, as you just simply stretch and wrap it around the male fitting threads of the pipe.
A key application factor when applying the Teflon tape, however, is that you want to wrap the tape in the same direction as the piece will spin when you thread it on. This will ensure the end of the tape will not get caught and pulled up when joining the galvanized pipe fittings.
You also want to make sure the tape is on the treads but not hanging off of the pipe. This can lead the tape getting cut and hanging out inside of the pipe where it shouldn’t be. It can also potentially lead to a clogged pipe and future headaches.
Teflon-Based Compound (Pipe Dope)
The next sealing product I would like to bring to your attention is Teflon-based compound, otherwise known as pipe dope. Pipe dope is a compound that you slather onto the threads. While this form of pipe sealant is a little messier, it has some advantages.
The Teflon-based compounds you can purchase at any plumbing supply store give you the ability to fully seat the threads as far as they can go. The compound is a thick liquid and not a solid piece of tape. This takes up less room in the narrower taper of the threads and allows for a deeper penetration. This factor allows for more sealed surface area inside the galvanized pipe fittings.
As well as good depth, the compound’s viscosity lets it coat all parts of the threads and create a nice sealed rim around the end of the coupling. And don’t worry about clogging, the compound is not going to break off in your pipe.
While Teflon tape and a “pipe dope” sealing compound are both great, they should not be used together in the same joint. Doing so will only increase your chances of a leak.
Test Run
Like all good things, it is best to start small. You want to know your skills are worthy of daily use before they are routed through your walls and in your home. One of the best ways to do this is by running this little test.
Take your pieces of pipe and prepare them with your choice of sealant. Either wrap your threads in Teflon tape or coat the threads with the pipe dope (but remember, never both!). After properly applying your sealant, join the pipe into the desired fitting by threading them together. Use a pipe wrench to fasten the fitting to the proper torque your pipe size calls for, this can be different depending on galvanized pipe fittings, pipe diameter, and wall thickness.
Join as many types of test fittings you want together. When you are finished, seal and thread on a pipe cap to one end of the pipe. Then, fill the pipe with water and set the pipe upright for a while and check it for leaks.
Another way to test your water tightness is to cap both ends of the test rig before you fill it with any water, and submerge it in a tub. Check for air bubbles as this is a sign of a leak. Once you have your conclusion, take it out, dry it off, and take off a cap and check for any water that may have leaked in.
While these methods are not as professional as the team at Custom Fittings Ltd, this will give you peace of mind that you can in fact correctly assemble galvanized pipe fittings without failure.
Project Preparation
Before you begin your project, you may want to be sure you have enough of the right supplies. Make certain that you have the right amount of compound, tape, pipe, and fittings to accomplish your task. You will also want proper tools such as the right size pipe wrench and the ability to torque the fittings to the right specs.
If you are tapping into an existing water line, make sure that your water is turned off at the supply. Failure to do so will result in more mess than one would ever need.
As you install section of pipes and galvanized pipe fittings, clear away any items that may prevent you from getting proper leverage. It is important that you fully seat the pipes and fittings to prevent leaks. Before you break any lines loose, it is a good idea to have a drip pan for any residual water left in the pipes.
Sealing Tips
It may take a few tries to fully trust your work. After all, your galvanized pipe fittings are running water in and out of your home every day, and a faulty pipe could be disastrous to your structure, wellbeing, and wallet. Whether it be for your sink, your fridge, or your toilet, these are some tips for making the most of every joint you seal.
It is important when using Teflon tape to lay smooth, even pieces around each end. When you wrap them, you don’t want to skip any threads. However, you should not pile too much on them either, as it won’t let you thread the pipes in all the way.
The proper way to do this is to hold the end of the tape to the threads at the tip of the pipe, pulling and wrapping the tape in a clockwise manner around the threads until all the threads are covered. This is performed by holding the role of tape in the opposite hand. The Clockwise direction should flow with the movement of threads and make the tape tighter when you initiate threading.
It is also important to note that you should only use one strip per end of a pipe, with no twists. You should wrap about 5 or 6 times to cover all of the threads. Pull tight to break, or simply cut the tape when you are finished and lay flat.
If you have decided to use a compound, you may find it a bit easier. Taking the provided applicator brush, apply just enough compound to penetrate into each and every thread. You should not see the metal edges of the threads coming through the compound. Continue so that all threads are covered.
When fastening, make sure your threads align properly and are not forced. Cross threading will cause leaks and make both the fitting and pipe unusable.
A Step in the Right Direction
I hope this helped you gain the confidence you need to take on the job. Although plumbing can be tricky, with the right precautions you too can seal galvanized pipe fittings like a pro. Having the right tools and knowledge will make or break your success in sealing galvanized pipe fittings.
Don’t be afraid of taking on some of the work yourself, take this information and apply it to your own needs at home and you’ll be surprised what kind of work you can do.
For more interesting DIY tips and tricks, other helpful articles, and information about nearly everything under the sun, check out our blog!