Sealing Your Foundation: Installing and Repairing a Crawl Space Vapor Barrier
In the United States, a homeowner can expect to spend several thousand dollars on repairing the damage caused by crawl space moisture.
The more extensive the moisture damage, the more expensive the repair will be. Most people think of roofs when they think of water damage, but that’s not the only place water can seep into your home.
If you don’t have a crawl space vapor barrier, you could be at risk of moisture damage. Moisture building up inside a crawl space can lead to a host of structural and pest issues. If you had a vapor barrier put in when you first bought the home, or years ago, it might be time to get it replaced or repaired.
CRAWL SPACE VAPOR BARRIER
A crawl space vapor barrier is a plastic barrier that prevents moisture and condensation from building up inside your crawl space. Vapor barriers are made out of polyethylene plastic and prevent moisture from rising in the floor structure.
BEFORE A VAPOR BARRIER IS INSTALLED
As all home improvement projects having a vapor barrier installed requires preparation. Making sure that your crawl space is ready for crawl space vapor barrier installation is the first step. Here is what should be done.
1. CLEANING YOUR CRAWLSPACE
The first thing you’re going to need to get done is having your crawl space cleaned. You can do this yourself, but if you haven’t been in your crawl space lately, you might want to consider having a professional. Crawl space cleaners have the tools and expertise to get the job done right.
If you do it yourself, you need to remove debris and moisture trapping materials from inside your crawl space. If it doesn’t serve a purpose, it should be removed. Part of crawl space encapsulation is keeping the crawl space free of moisture and dehumidified. That work can’t begin with debris filling your crawl space.
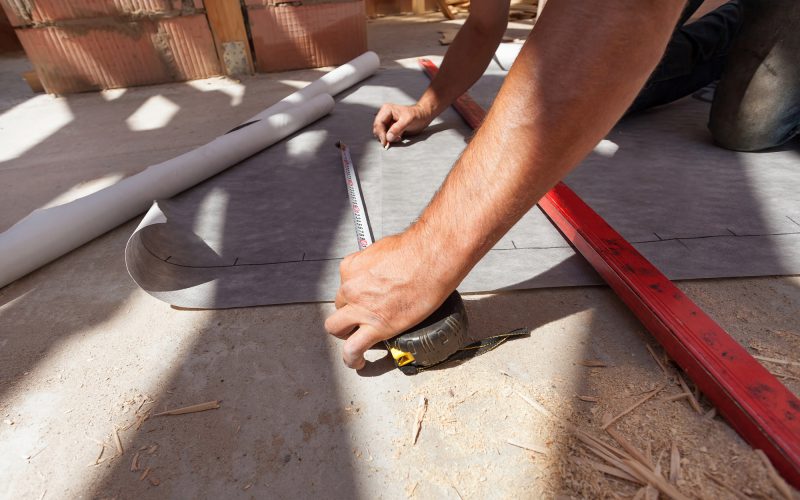
2. THE CRAWL SPACE NEEDS MEASURED
You’re going to want to know exactly how much of the vapor barrier material you need. To do this, you will have to measure the dimensions of your crawl space. Vapor barriers won’t work if you don’t use enough material to cover all the ways moisture invades your crawl space.
3. MAKE SURE THE CRAWL SPACE IS LEVEL
Not having the right grade in your crawl space causes all kinds of trouble. Water can flow into a crawl space and be unable to escape if the crawl space doesn’t slope. You won’t have a lot of slope in your crawl space, but there is no point to encapsulation if you don’t have enough to shunt water out.
Standing water is one of the gravest threats to a home. In a crawl space, this can lead to water rotting the floor joists and causing sloping or uneven floors inside your home.
THE NEXT STEP
Now that you have completed the checklist before installation, you’re going to need to get materials. Remember that while doing it yourself can save you money, it is not going to be easy to do. When you begin the project, you’ll need to cut the correct length of the vapor barrier.
You will have to secure the vapor barrier inside your crawl space. The plastic you’re using will need to be kept tight, as any loose sections can allow moisture to gather. This can cause weight against the vapor barrier, and if incorrectly installed, it could destroy your moisture control efforts.
THE COST OF A VAPOR BARRIER
The average cost of vapor barrier plastic is between 25 cents to $1.50 a square foot. You’ll also need to purchase the tape that seals it and specialty stakes. If you have a professional install your vapor barrier, you won’t have anything to worry about. A professional will already have all the tools and equipment they need in order to make the vapor barrier work.
Most homeowners can expect to spend between $1,500 and $15,000 for a moisture control solution, including vapor barriers or full encapsulation of their crawl space. The reason for such a large variance is that each job is completely unique. The amount of space you have, plus the type of moisture solution you go with will make a large difference.
For those who live in areas with a lot of termites and other harmful pests, a crawl space encapsulation is the best route to protecting your home from unwelcome guests.
HAVING A PROFESSIONAL INSTALL A VAPOR BARRIER
If you don’t have experience with doing home improvement projects, do not hesitate to contact a professional service. Even doing the prep work yourself will be a difficult and time-consuming chore. A professional cleaner and installation service can help you get the job done much faster and with less stress.
The professional crawl space experts at BAY Crawlspace can help you get a vapor barrier installed and are able to do full encapsulation for you. This will take a lot of the hassle out of your project and ensure that the job gets done right.
Encapsulation of a crawl space is a great step to not only protect your house. It can also make it energy efficient. By having a crawl space vapor barrier installed, you are going to be able to even lower your utility bill.
BAY CRAWLSPACE – #1 IN CRAWL SPACE REPAIR, HAMPTON ROADS
Don’t risk the structural integrity of your home. Moisture damage is expensive and can cause problems through every room in your home. Get a crawl space vapor barrier installed as part of a strategy to eliminate the threat of moisture in your home.
If you are in the Greater Hampton Roads area, let BAY do the work for you. Contact us for a free quote so you can know what your project is going to cost. BAY will make sure that your home is protected against crawl space damage and can even repair the damage that has been done to your crawl space.